Polymer dolls
I have done a little work with Polymer clay. In the past, I've made little Christmas ornaments etc. I've been wanting to learn more about it and create dolls vs simple animal figures. I bought various doll molds but, found them challenging to use but, decided to give it another try. This is a mold by Patricia Rose that I bought off Ebay. I made a little Elf out of it. I have a long way to go but, for my skill level, I was happy with the way it turned out. Even after getting the doll out of the mold, it's challenging to figure out how to do the hair, painting the face, and designing its clothes. These do not come with any clothes patterns and traditional ones have to be modified. Since her arms and legs don't bend, you have to consider that when making the clothes. I bought another packet of flesh tone clay today and will keep trying. I think I'll try an angel next. Here's my little elf girl. She is about 5 inches tall.
By the way, she is still an ornament. Hidden in her hat is an metal eye so, I can put a hook through it for hanging.
I'll take pictures of the process on the next one. If your interested in trying your own, maybe seeing my process will help you through some of the pitfalls you might otherwise encounter.
I started this blog due to my love of doll making and quilts but, I have since discovered art journaling and making Artist Trading cards so, I have added that to my blog also. I'm hopeful that there are other folks out there that enjoy multiple crafts like me. Please join me in my journey as I learn more about art and sewing
Thursday, October 30, 2014
Wednesday, October 29, 2014
Thread Art
I went to a couple of craft fairs this last weekend and picked up a few goodies. There is one particular textile artist that I think is great. I first came across her 3 years ago and bought one of her thread art kits. Since then, I bought a few more and this year, I picked up the gift tag set. I have not played around with the new set but, here is a picture of the thread art ornament I made last year with one of her books
You get a template that you can use over and over again, all the directions and, if you buy a kit you even get the thread and everything else you need to make one. Three years ago, I used her Christmas tree pattern for Christmas cards. This year, I want to incorporate the designs in her gift card line into some Artist Trading cards and, of course, gift tags.
Check out her website with the link below, Her prices are very reasonable and this is a fun craft to do.
http://www.tfw-designs.com/
Here are a couple of the ones I bought. The star one from above and the new one this year
Sunday, October 26, 2014
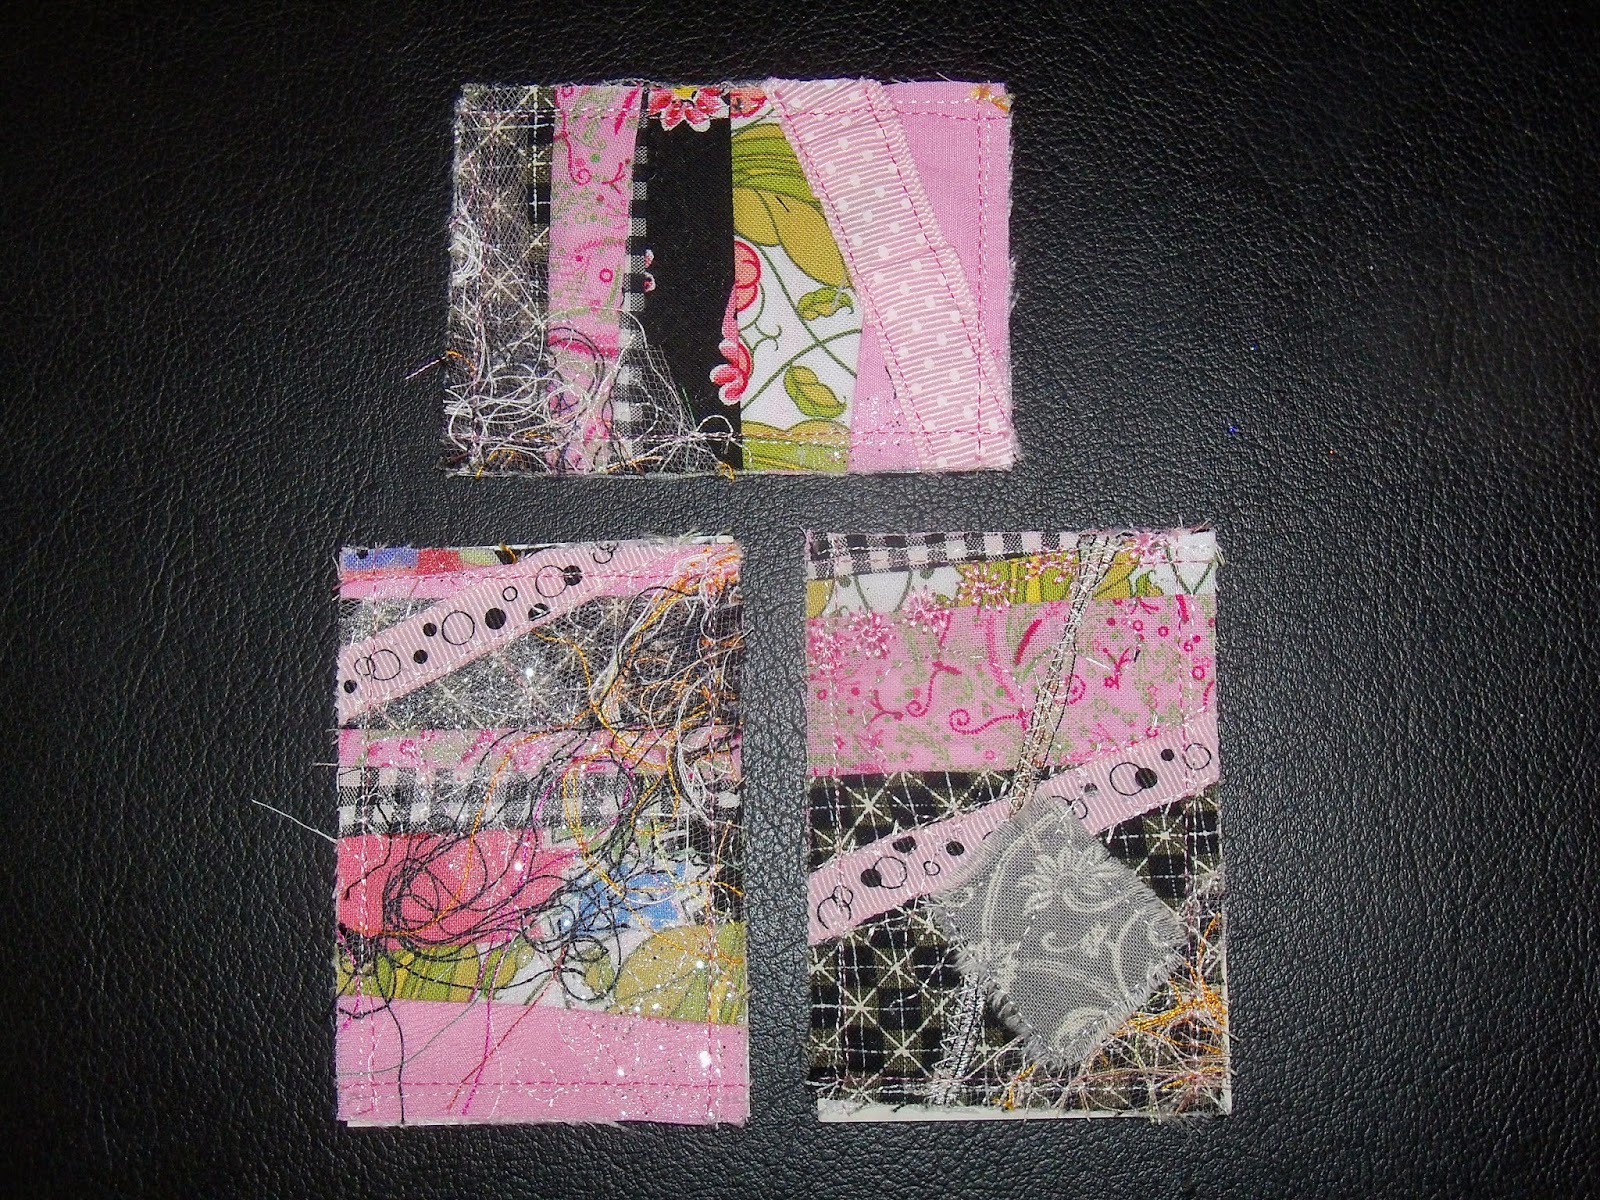
Artist trading cards "Mini Quilts"
I have mentioned before about how much I enjoy trading on Artist Trading Card sites. I made a series of Crazy quilts for trades. These were made on a bigger piece of cloth and then cut down to ATC size afterwards. The standard for an ATC is 2 1/2 by 3 1/2. I guess I'll see how they trade and if others share my interest in "Mini" ATC size quilts
Here is a picture of 3 of the cards:
Saturday, October 25, 2014
I enjoy working with Mixed Media and obviously have a big love of dolls so, I combined those 2 things and made this winter scene canvas. The doll is a paper piecing pattern by Gabrielle Polacco. I used that pattern with white paper for the skirt and a sparkly blue for the top although the flash washes it out in this shot. I need to get my daughter to teach me how to make better pictures because she is an expert at using cameras but, I think you can get the general idea from this shot. It's so much fun to work with mixed media. I really get into a creative mode when doing it.
Thursday, October 23, 2014
Green Quilt Completed!!!
Time to celebrate because I finished the quilt. I made my goal of finishing this month too so, I'm on a roll. I added a border after quilting the middle which has its advantages and disadvantages. The advantage is that it's easier to quilt the inside because you are moving around a little less material. This can be important especially when quilting the middle and trying to roll the whole end of the quilt under the arm. The disadvantage is that you can have a seam lump where you add the border. To minimize this, I grade the seam and then iron it. This makes the seam almost invisible although you still notice it when quilting the border. Here's some pictures of adding the border and, the finished quilt.
| Border pieces laid down so you can see the order they are place prior to sewing them on |
| Border pinned in place |
| Seam graded so reduce bulk |
| Finished quilt |
| Another view of the finished quilt |
Monday, October 20, 2014
I've been working on some artist trading cards swaps and I started an art jounal. The art journal is so I can experiment with different types of drawing or painting items and at the same time express what may be on my mind at the moment. I bought a mixed media journal from WalMart. I'll decorate the front eventually but I did take a picture of it so you can see what I purchased. I also took a picture of the first few pages. I lay down a lot of paint on these so I staple together several pages to support the weight. Many people use glue but, when I saw a youtube video of someone who used staples, that sounded better to me personally. When it comes to an art journal, it's all about personal choices and what pleases you.
| Mix media notebook I'm using for my art journal |
| I've worked on so many Halloween things that I created a page in the journal about it |
| Some of the things that are going on in my life such as new glasses, learning about Zetti Art etc |
| Beginning of a page with a Christmas theme |
| Let the quilting begin! |
Wednesday, October 15, 2014
Backing
I sewed the backing for the green quilt today. It's not a very exciting step but, it does not take long. I got 3 yards for the backing which I cut at 1 1/2 yards and the sewed those together side by side. I'll be putting together the "sandwich" of the quilt next.
I played around more with the basket pattern I posted on 10/12. I had cut enough for 3 sizes and have sewn them all together. Here is what I thought
1) The first one I made was 11 inches square with ties at 2 1/2 inches. It's the largest one. After sewing this one, my personal preference would be for the sides to come up a little taller
2) The second one sewn is the Halloween pattern at 9 1/2 inches square with ties at 2 3/4 inch. On the side with the plain orange fabric, I added decorative stitching for a fun element. I think this size is my favorite
3) The third one is 10 1/2 square with ties a 3 inches. I like the taller sides on this one
All three sizes work fine so, it's just a matter of personal preference on how big you want the square and how tall you want the sides. Here are some pictures if you are thinking about making these
The complete instructions to the link for the basket instructions are on my 10/12 blog posting. It's a fun and quick project.
I sewed the backing for the green quilt today. It's not a very exciting step but, it does not take long. I got 3 yards for the backing which I cut at 1 1/2 yards and the sewed those together side by side. I'll be putting together the "sandwich" of the quilt next.
I played around more with the basket pattern I posted on 10/12. I had cut enough for 3 sizes and have sewn them all together. Here is what I thought
1) The first one I made was 11 inches square with ties at 2 1/2 inches. It's the largest one. After sewing this one, my personal preference would be for the sides to come up a little taller
2) The second one sewn is the Halloween pattern at 9 1/2 inches square with ties at 2 3/4 inch. On the side with the plain orange fabric, I added decorative stitching for a fun element. I think this size is my favorite
3) The third one is 10 1/2 square with ties a 3 inches. I like the taller sides on this one
All three sizes work fine so, it's just a matter of personal preference on how big you want the square and how tall you want the sides. Here are some pictures if you are thinking about making these
| The 3 baskets laying flat. As you can see, the difference is not dramatic |
| Decorative stitching added to the Halloween basket. It's a variegated thread in fall colors |
| Side view of all three baskets so you can see the height. Again the difference is small. |
Subscribe to:
Posts (Atom)