Saturday, February 28, 2015

So many swaps and not enough time!

Lately, I have enjoyed preparing ATC's for upcoming swaps.  There are a number going on where I enjoy the theme idea.  It is very helpful to me also because it pushes me creatively to think of something to make for the swap and, in some cases try new techniques.  Here are some of my recent cards:
Pretty girls swap.  This one required all cards to be hand drawn and painted.  I used with watercolor or colored pencils

Unicorn swap - these are hand drawn and painted with watercolor

Flowers and Fairies swap.  These are all mixed media cards
I'm also doing a cute bunny/chicken swap for Easter.   Here is what I have so far:

By the way, there are many sites that offer free downloadable images you can use.  My favorite is "The Graphic Fairy".  If you are searching for images be sure to check out that site.  It's wonderful.  I put a link below.

http://thegraphicsfairy.com/


Sunday, February 22, 2015

Painting Butterflies

I bought this wonderful book called "Identify and Paint Butterflies" by Michael Canas.  It's a field guide and I immediately wanted to buy it the second I opened it up.  It is a nice source for learning how to paint butterflies in watercolor.  There are so many how to books and many fall short on getting you to the final product but, I think this one does a good job. Here is my first attempt.

I was happy with the butterfly and will be doing more plus working on the backrounds to obtain a nice overall composition.  I think I'll do the Monarch butterfly next.

Friday, February 20, 2015

Special paper effects

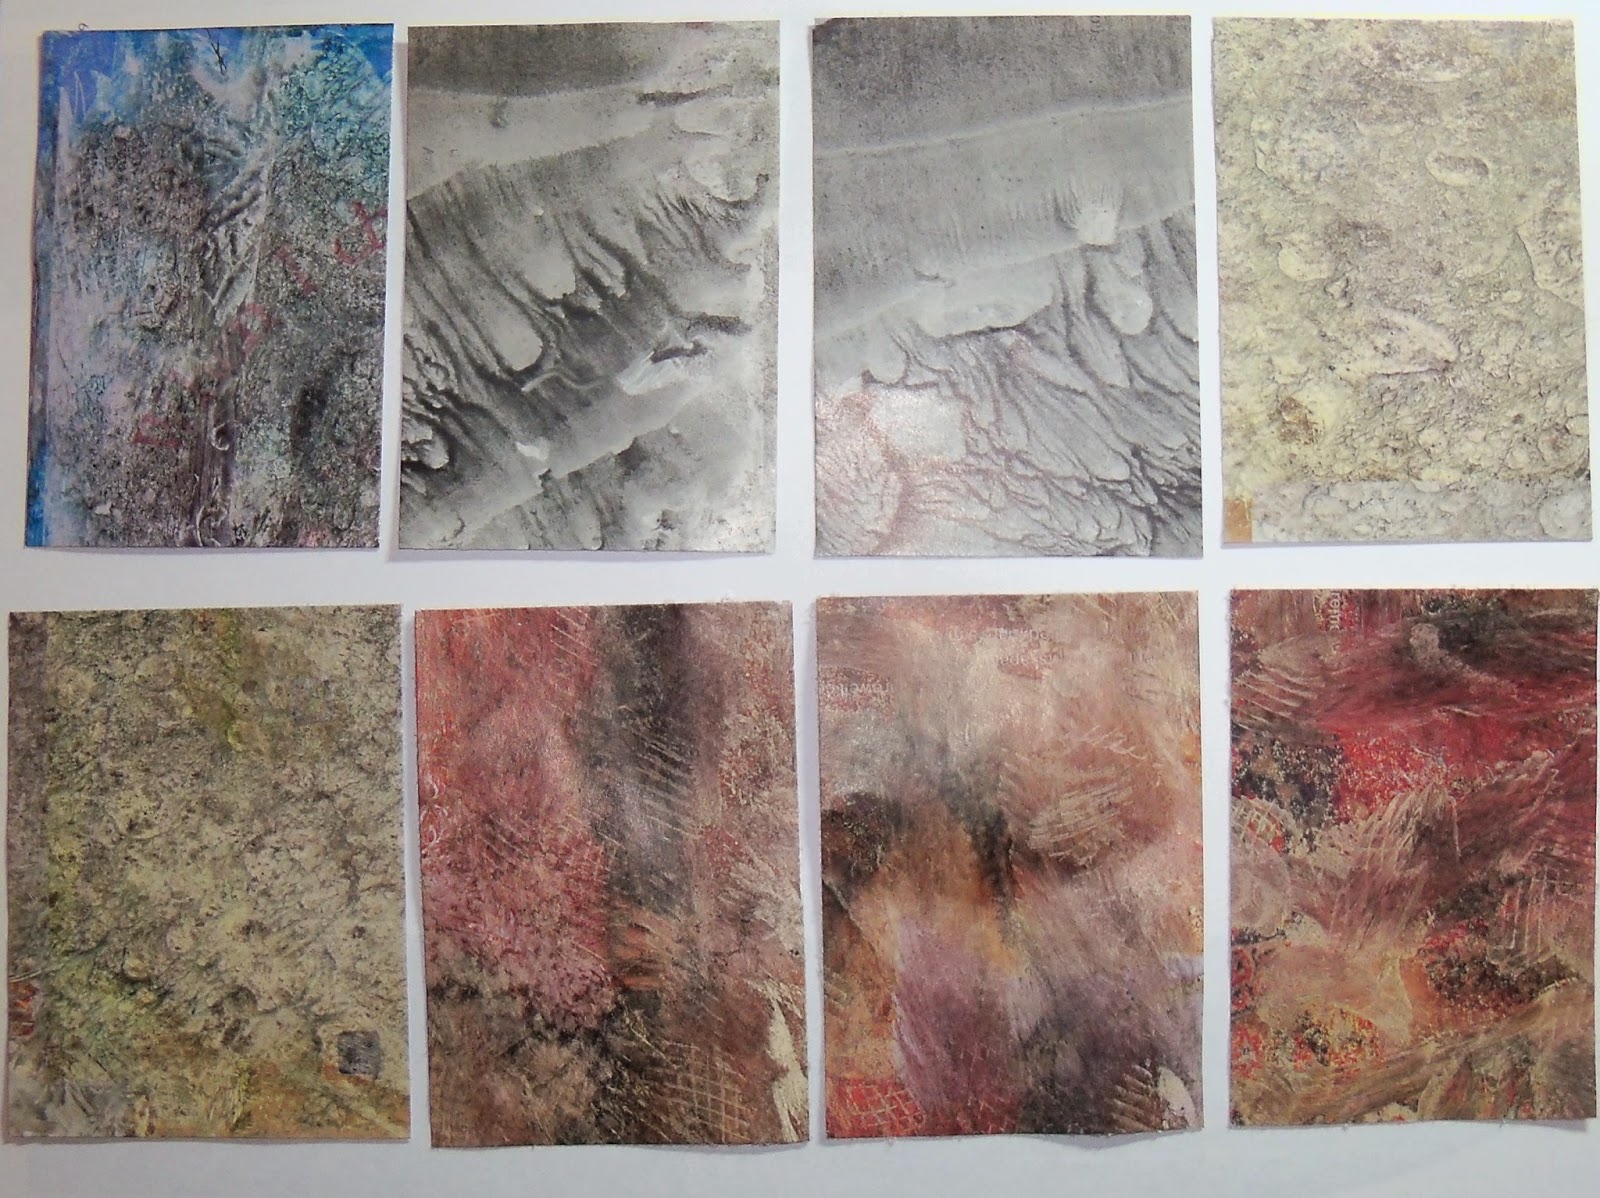
A couple of days ago, I learned of an effect you can give paper to create wonderful marbled effects and more.  Here's what is looks like:


I'll be using these for the backrounds of ATC's.  The two things you have to have are
1)  A National Geographic magazine
2)  A natural cleaning product called Citra Solv

There are multiple videos on youtube so you can learn how to do it yourself.  It's an easy process.  The hardest part is finding the product.  I got it at the Fred Meyer store in the natural cleaning product section.

This process seems to only work with National Geographic magazines (something about the ink they use) and this particular cleaner.  People on youtube have experimented with other products and magazines without getting any of these wonderful effects.

You basically brush on the concentrated version of the product on both sides of the page, close the page and let it work its magic.  Sometimes you just open the page and the magic is done and other pages you rub the ink around with your fingers or rub it with a plastic bag  You can just experiment with it and have fun.
A word of caution:

  • Use gloves because the ink is hard to get off your fingers.  
  • Use outdoors or, if that is not an option, be sure there is plenty of ventilation (it actually smells good but, it is strong)
  • Protect your work area from run off cleaner or possible ink
  • Watch a video or two on youtube prior to buying the product and getting started
  • Have a site ready to lay down wet pages that are completed so they can dry.  I used my dining room table after protecting it with plastic garbage bags.

Here is a link to the product site where the artist can go.  There are some really wonderful examples featured.

http://citrasolv.com/art/index.html


Sunday, February 15, 2015

Art Journal Cover Page

I actually have about 4 journals going at the same time.  They have different types of papers so, some I use one just for sketching, one for heavy paint, another for medium paint and the 4th one is a mod podge of things.  You have seen me work on the one I'm posting today but, I decided it needed a cover picture.  I had a collection of pretty roses on nice quality paper so, I decided to use those.  Here is what I came up with:
Before

Base coat of green, a beige and a redish brown color, mixed slightly and painted with a breyer

Added stencil using various shades of green

Fussy cut the roses and glued them on with a gel medium

Light coating of gesso mostly around the flower edges then I sprayed it with a yellow and green ink spray

Stamped letters outlined with a gel pen

Edges inked with green then black.  The final page


I also thought about using the saying "Where Creativity Blooms" but, it did not balance well so I shortened it to "ideas".  I'm wishing now I would have done the back at the same time!

 I plan on letting this sit for about 24 hrs and since it will see a lot of possible wearing, I'm going to give it a quick spray with a fixative.


Friday, February 13, 2015

Mixed Media Self Portrait

I bought a copy of "artists' cafe", mixed media magazine.  The very first article immediately struck me as something I would like to try.  It was a self portrait by Anna Dabrowska-Pekocka.  To do this page their were only 2 sentences on the technique so, I was somewhat left on my own but here is what I came up with using my image.  I was quite happy with the results and it speaks to some of the things I like (in particular, the color pink!)  Here is what I did


I had a picture taken of myself on my camera and I switched it to black and white on the computer.  I printed a 5 x 7 version of it.   After printing, I painted it with gesso to give it that milky look.  For the backround, I took a pretty paper napkin and tore it into pieces.  I glued it down and, let it dry then did a little bit of spray ink on it.  I finished the edges using a brown marker pen, pulling the color from the edges to the center.  I glued down the head and then went to town adhering whatever embellishment I could dig out of my stash and a few I bought.  The embellishment part is the most fun.

The artist said in her article that she did the embellishment and then in the next sentence she said she painted it with a flat brush and acrylic paint but, I could not quite figure that out so, I went with my method.  This magazine strives to inspire people and this article certainly inspired me.

Monday, February 9, 2015

Valentines Day Art Journal Page

With Feb 14th just around the corner, I wanted to do a page about Valentines Day.  I've been married for 37 years so, this page is a tribute to my husband and our love.  I took a few pictures to show you the process it did to complete the page.  Enjoy!

I pulled out all of these supplies for possible use in the page.  

I tore up Valentines Day napkins into small pieces and adhered them to the page.  Initially, I just let the napkins go over the edge and then trim them up when the page is dry

Page with all the napkins glued down

In this step, I added a light bit of gesso to smooth out the look of the napkins, sprayed red and pink Dylusions ink, torn handmade black paper and adhered to the middle and stamped fleur images over the red

Cut out a paper heart, decorated it, added the heart embellishment over a dollie and began my outline for the edges

Finished page

Sunday, February 8, 2015

Hand Dye Ribbon (Easy)

It is so interesting the color combinations you can achieve when you dye your own ribbon.  I picked a very simple method for a craft project.  This would not work for clothes but works great for art projects/paper crafting projects.

I used 100% Rayon seam binding that was 1/2 inch wide.  I cut it into the lengths I wanted and used a combination of watercolor crayons and water to dye them. It could hardly be any easier.  I think this would be a great project for any water based paint such as watercolors, distress inks, maybe even gelatos but so far, I've only done the crayons.  I was looking for various soft pastels.

The first pictures is the supplies I used (plus water that I put in a jar).  The second pictures is various ways I used the crayon and water and the third is a project I used them in.

White Rayon Seam binding, watercolor crayons, sample of colored ribbon
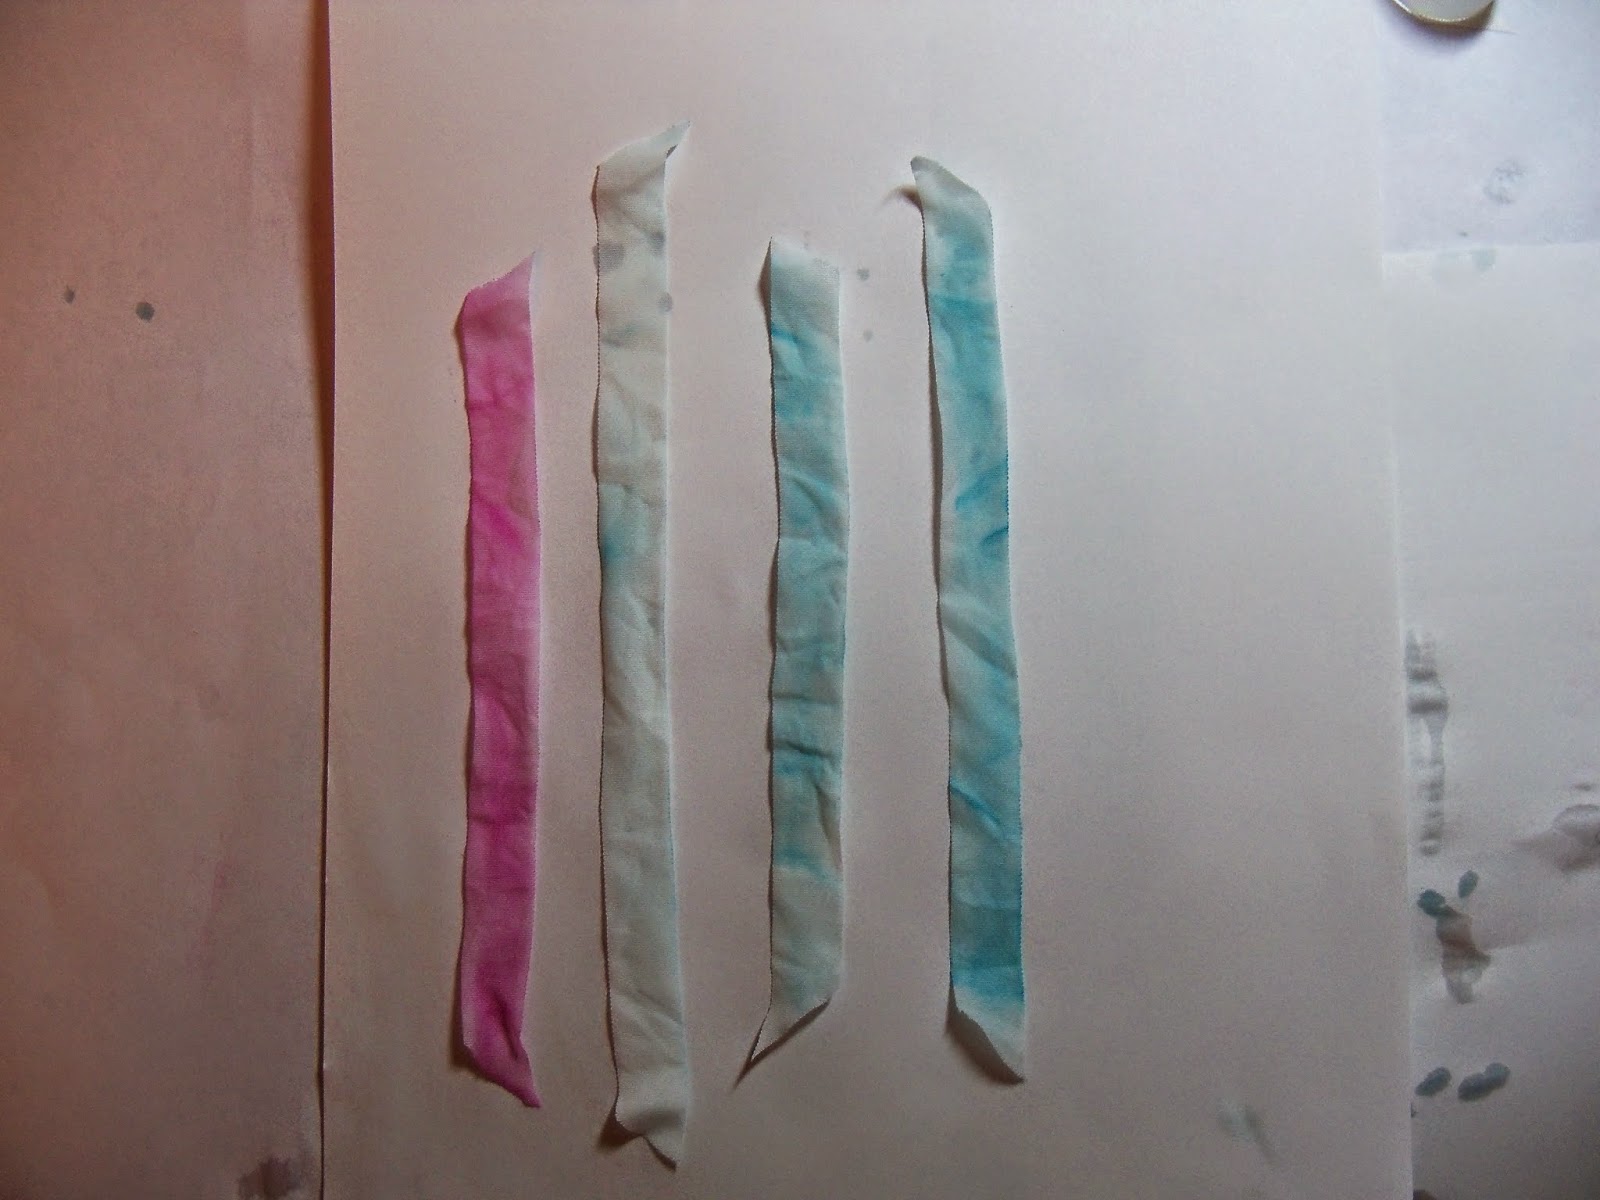
4 ribbons using various degrees of water
On this picture, the pink one was done by dipping it in water first the coloring it with a crayon.  This pink is an intense color so it makes a bright ribbon.  The blue is a lighter color.  The second colored dry then dipped in water and gives the lightest results, the 3rd is dipped then colored and the 4th is dipped, colored and dipped again.

Give it a try but be sure to use a water soluble color product or it probably will not work with this simple dipping method.

Some of the ribbons have 2 or more colors of crayons to add further interest.  After I dyed them, I dried them and then they were ironed.  You could skip the ironing part and try scrunching them up for an even different look.

Saturday, February 7, 2015

Fabric and Fiber ATC's

As a quilter and a sewer, I can't help but go back to my roots sometimes and make Artist Trading cards using fabric, quilting and decorative stitching techniques.  It's so much fun to make these little cards and just have the freedom to create whatever you want.  Here are the 3 I did this week.  I used cheesecloth that I stained with coffee on pictures 2 and 3.  I also used a stabilizer under all 3 because of the large amount of stitches and pieces in a small piece.


Thursday, February 5, 2015

Doodle Lovers Art journal page - part 2

I finished the page.  Here is the final product:


To color it in, I used a combination of products including prisma colored pencils and various markers.  My favorites for this page were the markers I got from Stamping Up.  They are translucent so, the color behind it showed through.  I really like that effect.  I did a close up of one of the flowers.  The petals of the big flower are all a light purple but as you can see, it has many colors in them as the color behind shows through.

I'm already dreaming of the next page to do.  See you soon with more postings

Wednesday, February 4, 2015

Doodle lovers art journal page

I enjoy zentangle and just doodling with a pen.  I was inspired to do an art journal page from a book I received as a gift.  It's one a coloring book that's full of doodle flower images and leaves.  I used some of those ideas along with some other ones and started this page.

Inspiration book

Painting down the base with a mixed of yellow, pink and orange.  I also added some dots for more visual interest

Doodles drawn in using EK journaling pen.  For this project, it had the perfect tip for width and ease of going over the paint.


The page is not done yet.  I want to color it in and add something more to the top.  More to come on this page!

Monday, February 2, 2015

Organizing small paper bits

I have collected a lot of paper punches and small paper bits and they were tucked away in multiple spots so, I decided to tackle this problem and came up with this little envelope book.  I cut heavy cardboard just a little larger than the bags I wanted to use, covered and decorated it.  Then added jump rings to hold it all together.  The bags are punched at the bottom and attached to the rings inside.  Now I have easy access to my things.  I may even label them next!!

Cover the front a little larger than it's size and wrap it around to the inside

Cover the inside 

Decorate to your hearts content

Punch bags at the bottom and slip through jump rings 
 This is a fun project plus I get the added benefit of being more organized.  Now, to find the rest of those punches!

Sunday, February 1, 2015

Tree Stencil and flower punches

I bought a tree stencil about a month ago so, I wanted to do an art journal page to play around with it.  I've seen this stencil around and there seem to be several similar versions


To start with I used acrylic paints and put in the sky using 2 values of blue and some white.  I mixed them just slightly.  For the field, I laid in some green.  I like olive tones so, I used my primary green and mixed it with brown.  I also mixed a separate batch and added white.


 Once the paint dried, I put the stencil on.  I wanted the tree to be bigger than the stencil so, after I filled it in with black paint, I removed the stencil and extended the base to the bottom of the page and used a Copic marker to smooth out the branches.  I think that the next time I use this stencil, I'll have to use a different application method because the tree needed a lot of repair work!

After the tree was in place I began gluing down flower punches and really went to town with them!!  Finishing touches are edge trim, using a edge stamp by Dylusions, various dragonfly, bird and leaf stamps and finally a paper fairy which if fussy cut out.

I have another idea for this stencil so I'll show you that one too.


Final version

Overall, it was a fun and fairly easy page.  For me, art journaling is a fun way to learn more about painting and mixed media.